Route name: Akaiwa ridge (赤岩尾根)
Mountain: Ryogami-san (両神山)
Map sheet: 27 [Yama-to-kougen-chizu (山と高原地図) series]
Time: 9-10 hours
Difficulty: Exposed scrambling

The area around Mt Ryogami is one of the Tokyo
region’s best adventure playgrounds. It’s a popular mountain, on the list of
the hyakumeizan (百名山);
and both its eastern hiking trail and the Hacchō
ridge (八丁尾根) to the
northwest, with its endless chains, are always busy at weekends. But very few venture
off these main courses.
What most people don’t realise is that the mountain
can also be climbed by several variation routes, navigating over and around
steep and exposed pinnacles, often requiring a belay or a rappel.
The
Akaiwa ridge is a rugged variation route that offers an exciting and exposed
ridge traverse, and can be extended along the Hacchō ridge all the way to Mt Ryogami’s summit. It
features many steep sections and rock scrambles, with plenty of exposure, and
is a popular route among mountaineers looking for a bit more adventure than the
standard trails can provide.
Getting
there:
You’ll
need a car for this itinerary, as there is no public transport to the start of
the route. First head to Chichibu (秩父) in
Saitama, and from there you need to take route 140. Stay on this road as it
winds its way up the Arakawa river, past the roadside station at Ōtaki (大滝), and keeping right at the fork just after
Ōtaki. After a few more kilometres you’ll come to the dramatic Raiden Todoroki
loop bridge (雷電廿六木橋).
Continue
alongside the Okuchichibumomiji lake (奥秩父もみじ湖) until
you come to a junction with a tunnel on your right. Take this right turn
through the tunnel onto route 210. Stay on route 210 as it winds its way up an
increasingly stunning gorge, surrounded by limestone walls. In the upper
reaches of this road, you will pass concrete factories with mounds of lime,
disused houses and infrastructure from the days when this area was a major
mining operation for concrete production.
Eventually
you will reach a sharp bend with a lay-by, near an old mining facility. Park in
this lay-by.
Description:
From
the lay-by walk up the small mining road just off the left of the main rindou,
past abandoned mining houses to a trailhead on the right. Take this trail,
gentle at first but soon steepening into zigzags up the forested slope on the
left side. Once you hit the ridgeline, continue upwards as the trail steepens
further up the leaf-covered hillside in front of you. Eventually, after around an
hour of hiking, you will reach the Akaiwa col (赤岩峠). The trail to
the left will take you to nearby 1532m Mt Onageshi (大ナゲシ),
a fun scramble in its own right. But the Akaiwa ridge lies to your right.

To
gain the ridge, hike up the trail for several minutes until it strikes
leftwards across and up into a broken gully (pink tape markers). Scramble up
this gully to a small col. Now the route begins in earnest.

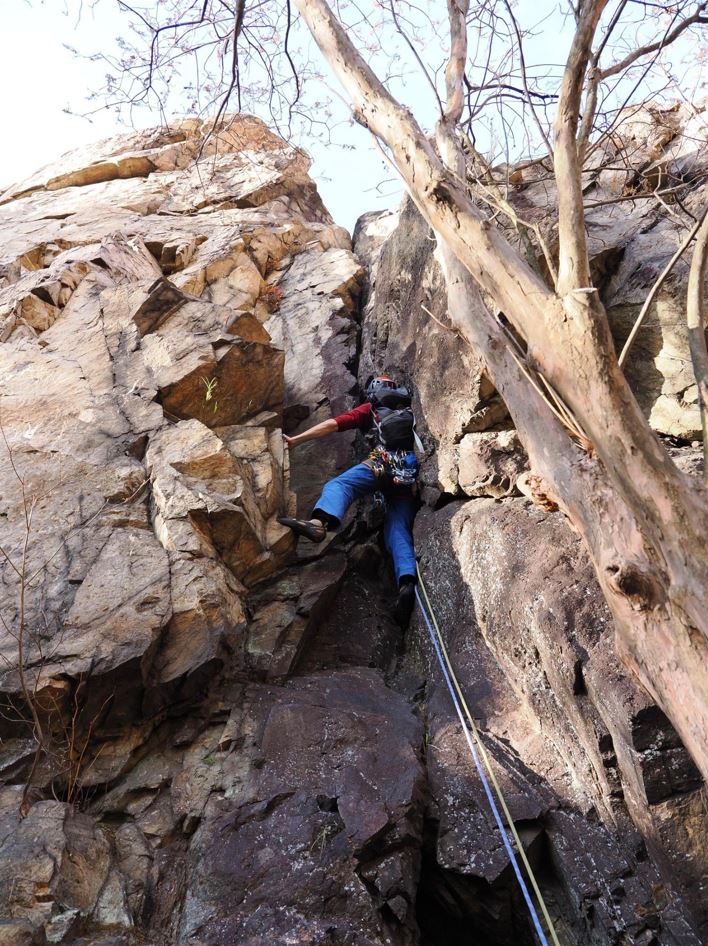
Scramble
up a steep rock step on your right, then continue up easier ground to gain the crest
of the ridge leading up to the summit of the Akaiwa (赤岩, “Red
Rock”). This distinctive large rock section, visible from the road far below, gives
the ridge its name and is the first peak along the route. It involves some
scrambling and minor climbing moves. The views from up here are really
fantastic!

Now
continue along the ridge for several hours. Route-finding is mostly straightforward,
but sometimes rather unclear. You will cross another minor peak of 1570m, and
will pass sections of fixed rope and lots of exposed areas.


Eventually
you will reach the most exciting section of the ridge, an exposed downclimb towards
a crest of jutting rock, followed by a steep climb up the face behind the crest.
It would be prudent to rope up for this climb, and it will generally require
two pitches to the top.


The
next obstacle along the ridge is a vertical chimney. It can be soloed
comfortably if you have the confidence, but there are in-situ pitons if you’d
prefer the security of a rope.

Continue
along the exposed ridgeline for another hour or so and you will eventually find
yourselves descending slightly to the Hacchō Pass and the end of the Akaiwa
ridge traverse.


Descent:
From
the Hacchō Pass, the shortest descent is to take the signposted descent trail
that drops off into the valley on your right. After
descending for about 40 minutes map time, you will get down to the road.
Continue walking down this road and in about another 30-40 minutes you will
reach the lay-by where you left your car.
Alternatively,
if you want to continue to the top of Mt Ryogami (recommended), just carry on
along the Hacchō ridge for several hours more exposed scrambling with chains
until you reach the summit.

The
descent from Mt Ryogami back to the lay-by is a bit more involved though.
Continue over the summit and down the ridge beyond for a short way and you will
come to a roped off trail on the right. Take this trail and continue down a
rather indistinct trail into the sawa on your right. It should take around 1.5
hours to get down to the rindou near the same point where the main trail down
from the Hacchō ridge reaches it too. But the experience will be entirely
different. This trail is not marked on the hiking maps, and is rather steep and
exposed in places, so take care. There is pink tape on trees all the way down,
but it would be prudent to have a GPS map as a back-up in case you lose the
trail. One could almost think of this descent trail as a variation route in its
own right.
Summary:
An
exhilarating circular scramble over the top of this fine hyakumeizan, with
around 7-8 hours on consistently steep and exposed terrain. Bring a 30m rope
and a selection of slings for protection as needed.
***
NEWS ***
Don't
forget to order your copy of Volume 2 of the "10 Classic Alpine Climbs of
Japan" series from Amazon today.