Route name: Hoshiana Shindō (星穴新道ルート)
Mountain: Myougi-san (妙義山)
Map sheet: 21 [Yama-to-kougen-chizu (山と高原地図) series]
Rock type: Conglomerate
Time: 5-6 hours (+ 3-4 hours for the full continuation hike)

Mt Myougi, or Myougi-san (妙義山), is home to some of the most adventurous hiking and scrambling trails in the Kanto area. Formed from an old volcanic caldera 3 million years ago its softer layers of sedimentary rock eventually wore away, leaving a series of jagged peaks and ridgelines characterised by rocky pinnacles and steep faces of volcanic conglomerate rock.
The two main roughly parallel ridgelines of Mt Myougi are known as Omote-Myougi (表妙義) on the southern side, and Ura-Myougi (裏妙義) on the northern side. Both offer plenty of adventure and a full traverse of the Omote-Myougi ridge in a day, over the main peaks of Hakuun-san (白雲山) and Kondõ-san (金洞山), is a fantastic challenge.
The Hoshiana Shindō is an old abandoned hiking trail up the Northwest ridge of Mt Hoshiana, a jagged peak that sits like an eagle’s lair at the western end of the Omote-Myougi ridgeline. The peak takes its name from the ‘hoshiana’, a striking star-shaped hole that runs through the centre of its upper summit block. In former times the Hoshiana Shindō was an equipped trail to the summit, with chains to facilitate safe passage up the many exposed sections on the ridge. However, it fell into disrepair years ago and was removed from the hiking maps; perhaps due to the difficulties of trail maintenance, or perhaps due to numerous fatalities.
What remains today is quite possibly the
finest ‘hardcore’ adventure hike in Kanto. The chains are by now all old and
rusty (and in many crucial places non-existent), and a climbing rope and the
ability to set anchors and running protection and to belay / simul-climb safely
are mandatory. Experienced parties should have no problems completing the route
but, even so, vigilance and care are most definitely required from start to
finish.

Getting there:
You can get here by taking a train to Yokokawa (横川) station followed by an hour’s walk up the road to the trailhead (or a taxi if you can find one), but a car will make it easier to access this route.
If
driving from Tokyo (東京), take the Kanetsu expressway and follow the signs for
the left fork onto the Joshinetsu expressway shortly after the Kamisato (上里) Service
Area. Come off at the Matsuida-Myougi (松井田妙義) exit and follow route 51 north to
the Goryo (五料) junction. Turn left onto route 18, then
take the first left onto a local country road, and follow this road to the
Nakagi river and Myogi lake (妙技湖). Continue up the road to the far end
of the lake and on up the Nakagi river a short way until a right turn and a
bridge across the river. Not far past this bridge you will come to the car park
of the now-abandoned Kyū
Kokumin Shukusha Uramyōgi hotel (旧国民宿舎裏妙義). Park here as the trailhead
lies just a couple of hundred metres up the road.
Approach:
Walk
back down the road from the car park across the bridge, and then turn right.
Pass through the barriers and walk up the old rindou for about 1.5km until you
reach a famous sign on your left warning in Japanese that the Hoshiana Shindō is no longer in use.


Walk past this sign and cross the river, then
follow the path through a couple of zigzags and then up the hill parallel to
the river. After about 10 minutes you will reach a junction with a sign for the
Onna-zaka hiking trial pointing off to your left down to the river. This is the
start of the Hoshiana Shindō route. Ignore this sign and continue straight on.

Description:
Follow
the narrow trail up for several minutes until it appears to peter out, then
double-back to your right and contour across the slope to gain the ridge.

Now
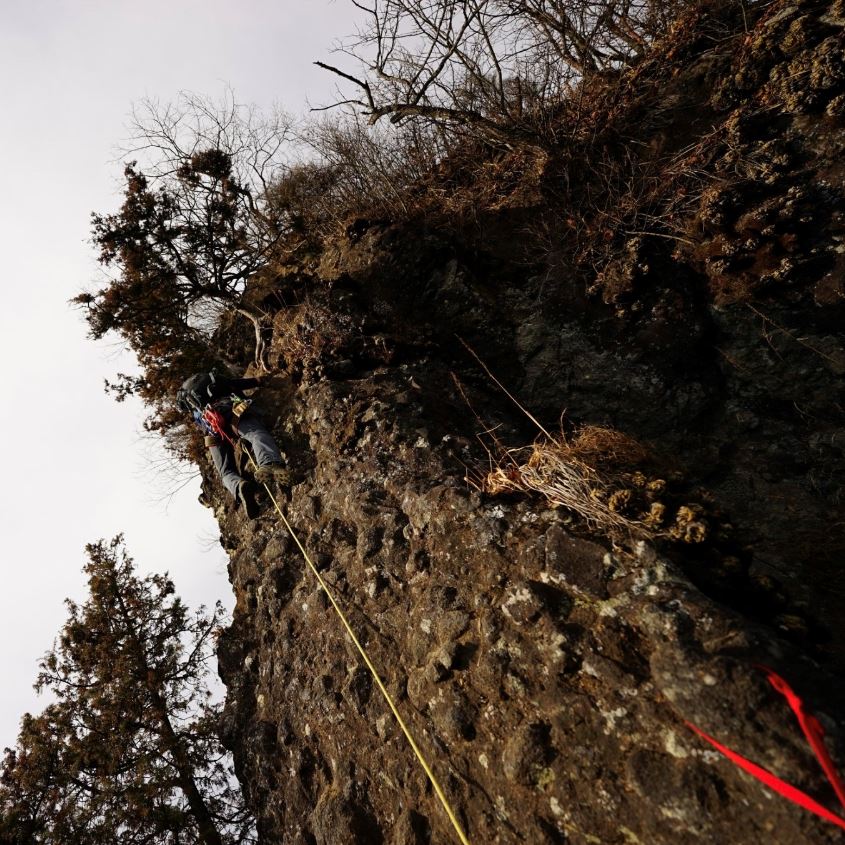
continue hiking up the crest of the ridge. Eventually, after gaining some
altitude, you will reach the first rock step equipped with a disgusting old
chain and fixed ropes of extreme vintage. Climb up the fixed gear rightwards
and then continue up and left to gain the top of the step and the ridge crest.

Continue
up the ridge until you reach the next pinnacle. This one is very confusing, and
most parties get led up an apparent trail to climber’s right. This is the wrong
way though, and it gets progressively more exposed until the holds finish,
leaving you in the middle of a wall with nowhere to go. The correct way is to
follow a faint low traverse on climber’s left, then scramble up a short arête
to reach an in-situ anchor at the top of a rappel. If you have a 50m rope getting
here will require two pitches.
There are fixed ropes down this rappel, but trusting your life to them would be a dice-roll; much better to abseil down and then scramble across the following traverse to reach easier ground.

Once
you’ve turned this pinnacle and are back on the ridge, the way ahead should be
fairly obvious, albeit with sections of enormous exposure. It is worth just
keeping the rope out for the rest of the day and simul-climbing for the most part,
with occasional stops to belay anything involving more serious climbing.


After several more hours of scrambling, climbing and belaying you will arrive at the main summit hiking trail of Mt Hoshiana.

On your right is the West summit of Mt
Hoshiana, accessible by a pitch of exposed but easy scrambling, with plenty of
trees for slings and good options for a trad belay on the summit itself. The
views from up here are spectacular, so I recommend making the time for an out
and back ascent.

Once back on the main trail continue around the bottom of the summit block, past an exposed pitch with in-situ petzl bolts to protect you through a short rock step, to reach easier ground on the ridge crest.

At this point, you have the
option to climb to the main summit of Mt Hoshiana. Head right along the ridge
until you reach a large boulder with an in-situ cord anchor at the foot of a
steep and exposed pitch of vertical conglomerate rock. This pitch is fairly
well-featured, and not too difficult, but it is completely runout with no
protection options until a small tree about 10-15m up. Another 5m of steep
scrambling brings you to an in-stu rappel anchor on a solid tree. From here the
summit marker can be easily reached.


To
get back down, just rappel from the tree anchor.

Now you
need to traverse the exposed ridgeline all the way to the junction with the
main Omote-Myougi hiking trail to Kondou-san. The most efficient way through
this ridgeline is to keep the rope on and simul-climb, placing slings on trees
and clipping the petzl bolts on the more exposed sections as required. It will
likely take around 1.5 hours to reach the main trail junction once you’ve
passed through the West summit of Kondou-san.

Getting down:
Once on the main Omote-Myougi hiking trail you
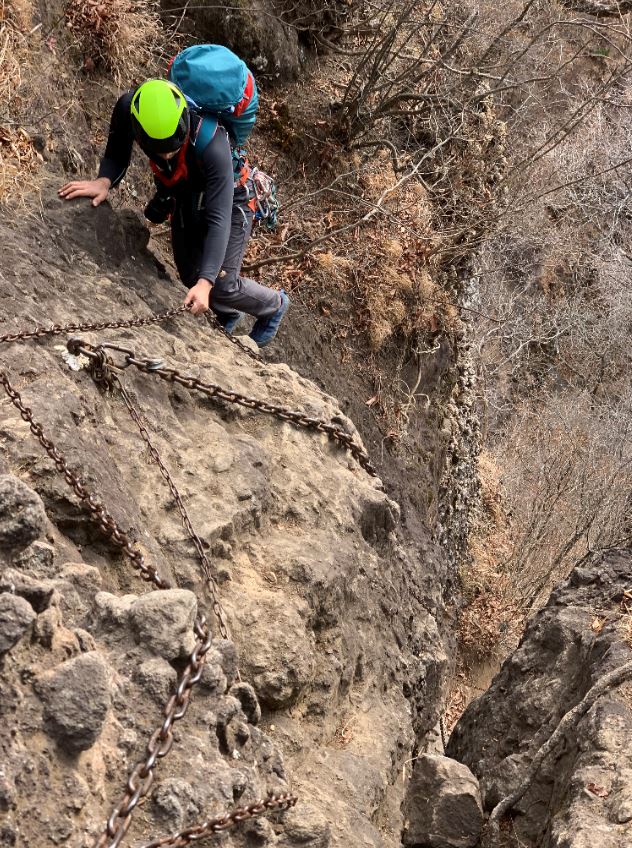
need to continue over the Central and East summits of Kondou-san. This
exhilarating trail is a mix of well-protected rock steps with shiny solid
chains, and exposed scrambling and down-climbing across often knife-edge
terrain. The views down to the carpark and the road on your right are quite
breath-taking.


Once you reach the East summit of Kondou-san,
continue along a less protected section until you eventually arrive at the top
of the Takamodoshi pinnacle. Continuing past this airy summit, you now need to
descend what is the crux of the Omote-Myougi traverse; a 60m series of chains
down a steep arête.

Once through the chains, another 15 minutes of scrambling will bring you to the junction with the Onna-zaka trail on your left.

Take this trail down and follow it all the way back to your starting
point and along the road to the car park. Enjoy the views of the Hoshiana,
visible far up on your left from various points in the middle section of your
descent.
Overall:
A
fun and committing route with exposure from start to finish, and requiring good
efficient rope skills to complete safely and within the day. Despite its modest
altitude of around 1000m, this route is more akin to alpine climbing and
scrambling than rock-climbing or hiking. Bring a 50m rope and a selection of
slings and alpine draws, and a serious head for heights.
***
NEWS ***
Don't
forget to order your copy of Volume 2 of the "10 Classic Alpine Climbs of
Japan" series from Amazon
today.

No comments:
Post a Comment